
Having recently set up a number of computer labs using Microsoft Endpoint, Intune, and Autopilot White Glove, I’ve picked up a few tips and tricks to make the process a little smoother.
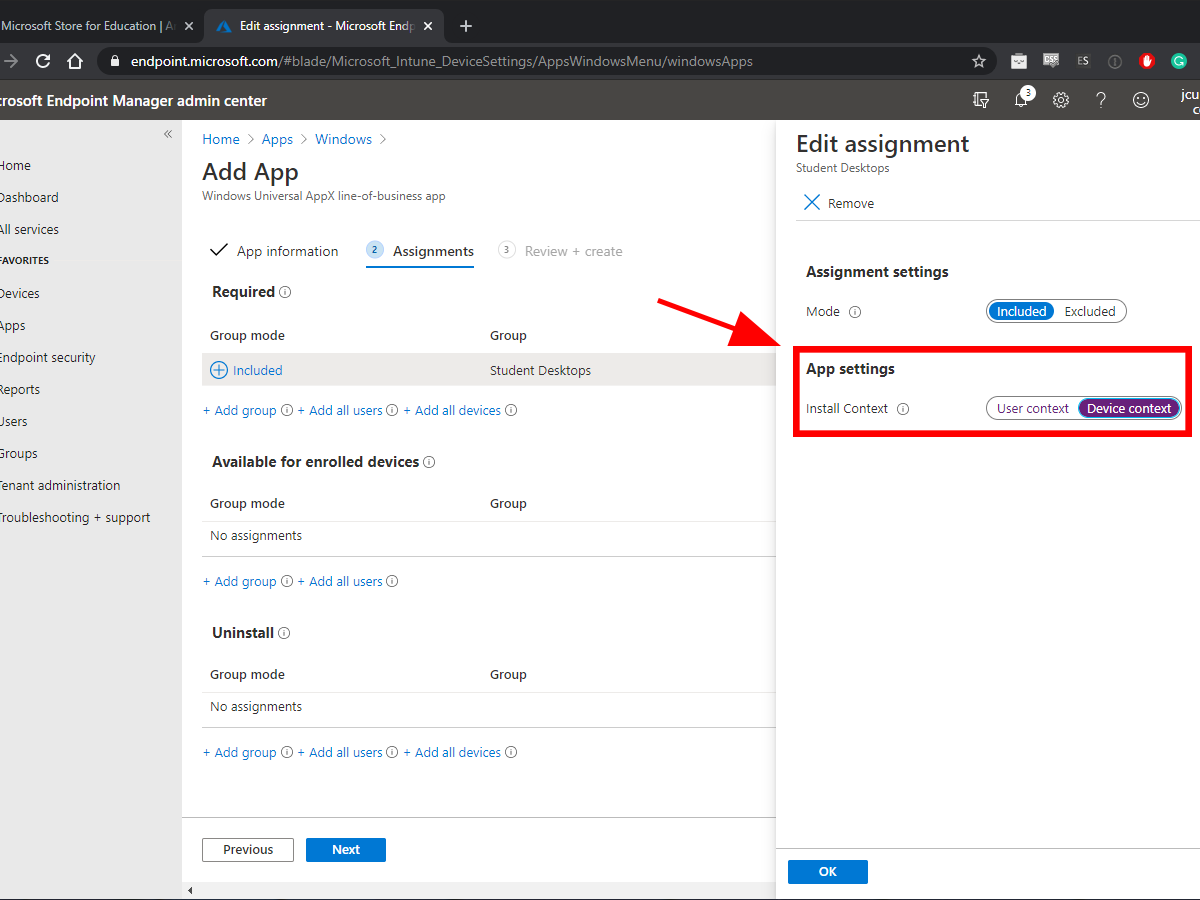
When deploying free apps from the Windows Store for Business or Education in Endpoint Manager you can add the URL to the app and Endpoint will do a good job of either making the app available for your users to download in your company portal, or automatically deploying the app to the user. However, when you deploy Windows Store apps this way you are locked to using the ‘User Context‘ Install Context. What does this mean?
Microsoft explains it like this: https://techcommunity.microsoft.com/t5/intune-customer-success/how-application-context-assignment-and-exclusions-work-in-intune/ba-p/1073357
Device Context: This means that when they are installed, they apply system-wide and the app can be used by anyone who logs onto the device.
User Context: This means that a user needs to be logged on during the installation, and the app will only be installed in their user profile. Other users who logon will not see the app in their profile.
When you set up a computer lab you don’t want to assign apps to individual users, otherwise, the app will need to install each time a user access a machine – on each machine. Meaning that if a user uses a different machine each time they use the computer lab they will need to wait for the app to install every time… this is less than ideal. The Autopilot White Glove process also won’t be able to pre-install the app during the provisioning process.
The Solution.
Download the .appx file from the Microsoft Store, upload it to Endpoint Manager, and deploy the app in Device Context mode. This will mean the app is installed for all users of the computer and can be included in the Autopilot White Glove process.
1. You first need to show offline apps in your Microsoft Store. Log into your store at educationstore.microsoft.com or businessstore.microsoft.com and select Manage from the top menu.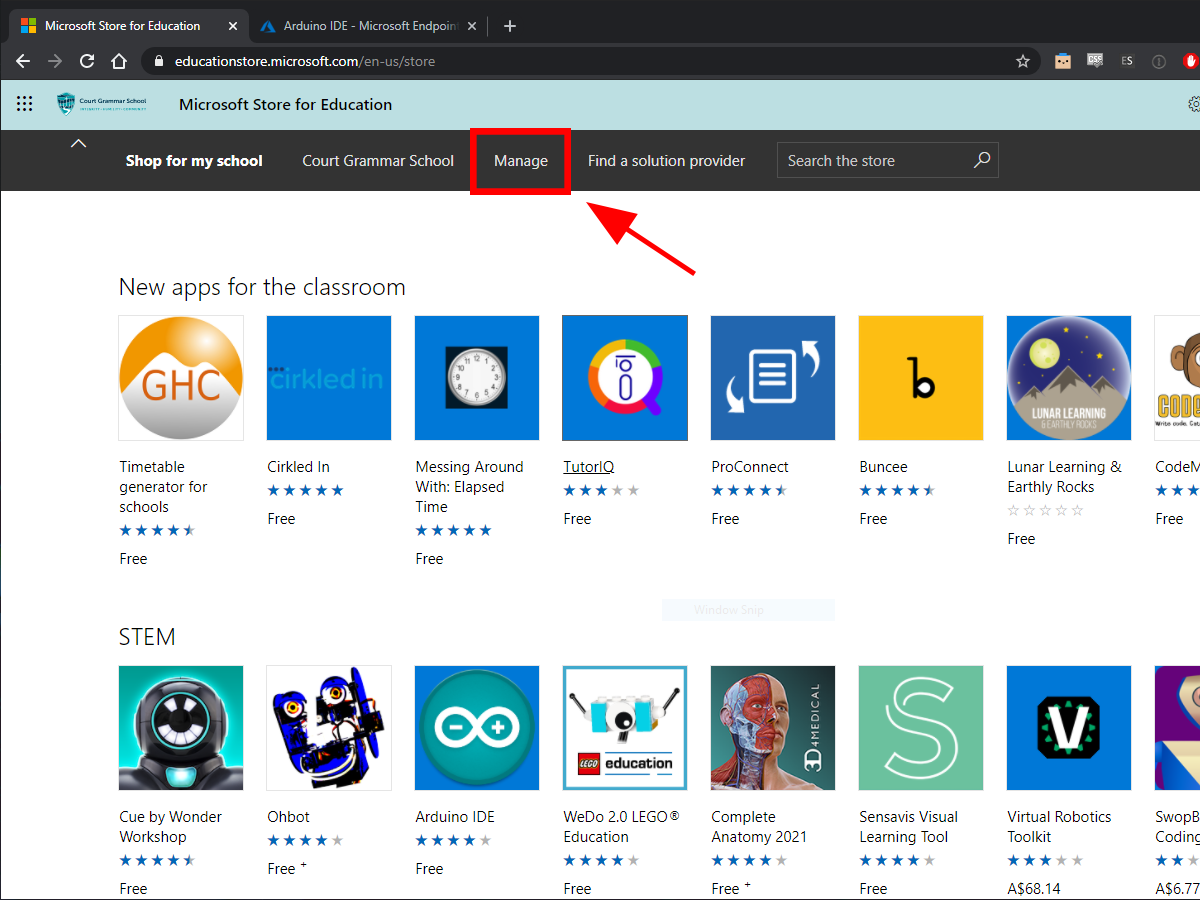
2. Select Shop Settings from the Manage page. 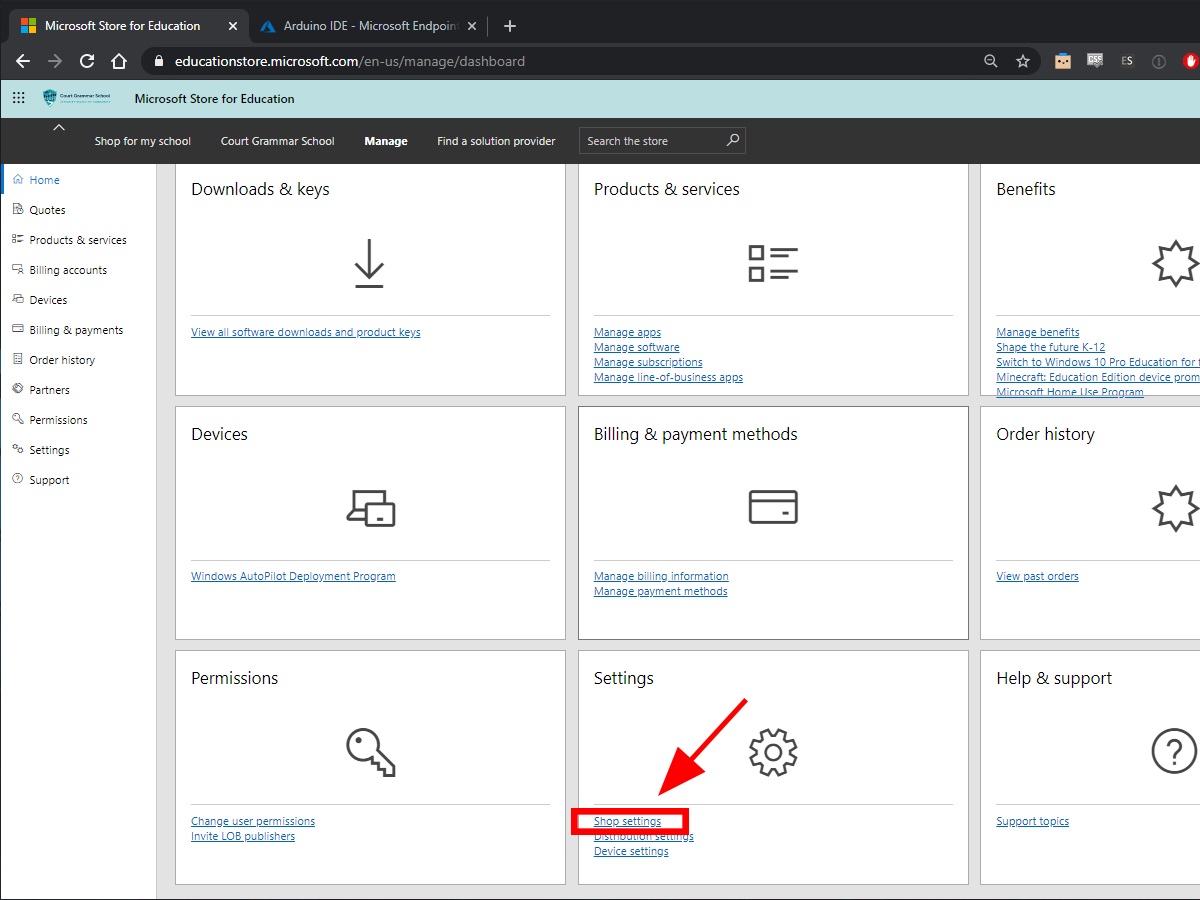
3. At the bottom of the next page enable Show offline apps.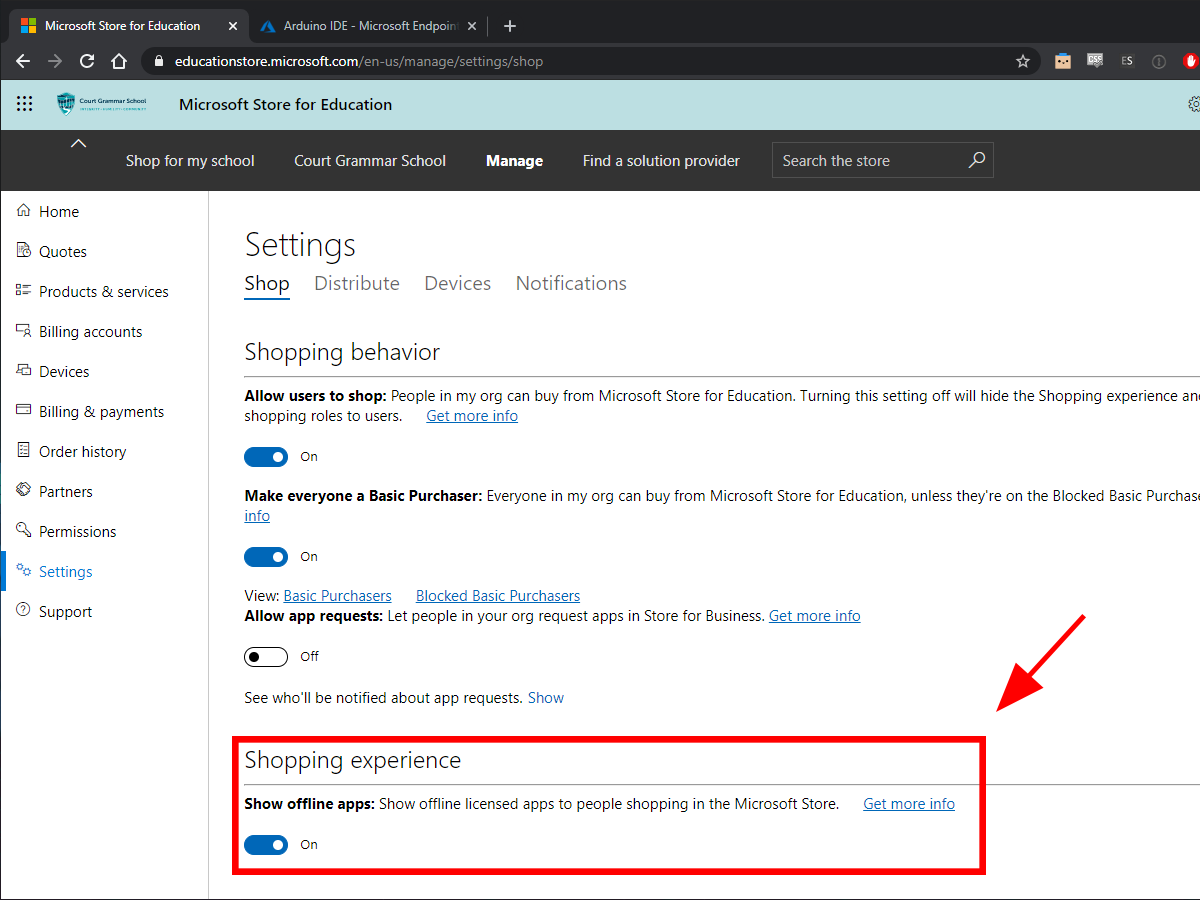
4. Now search the store for the free app you wish to procure. Select Offline from the License type drop-down and then select Get the app.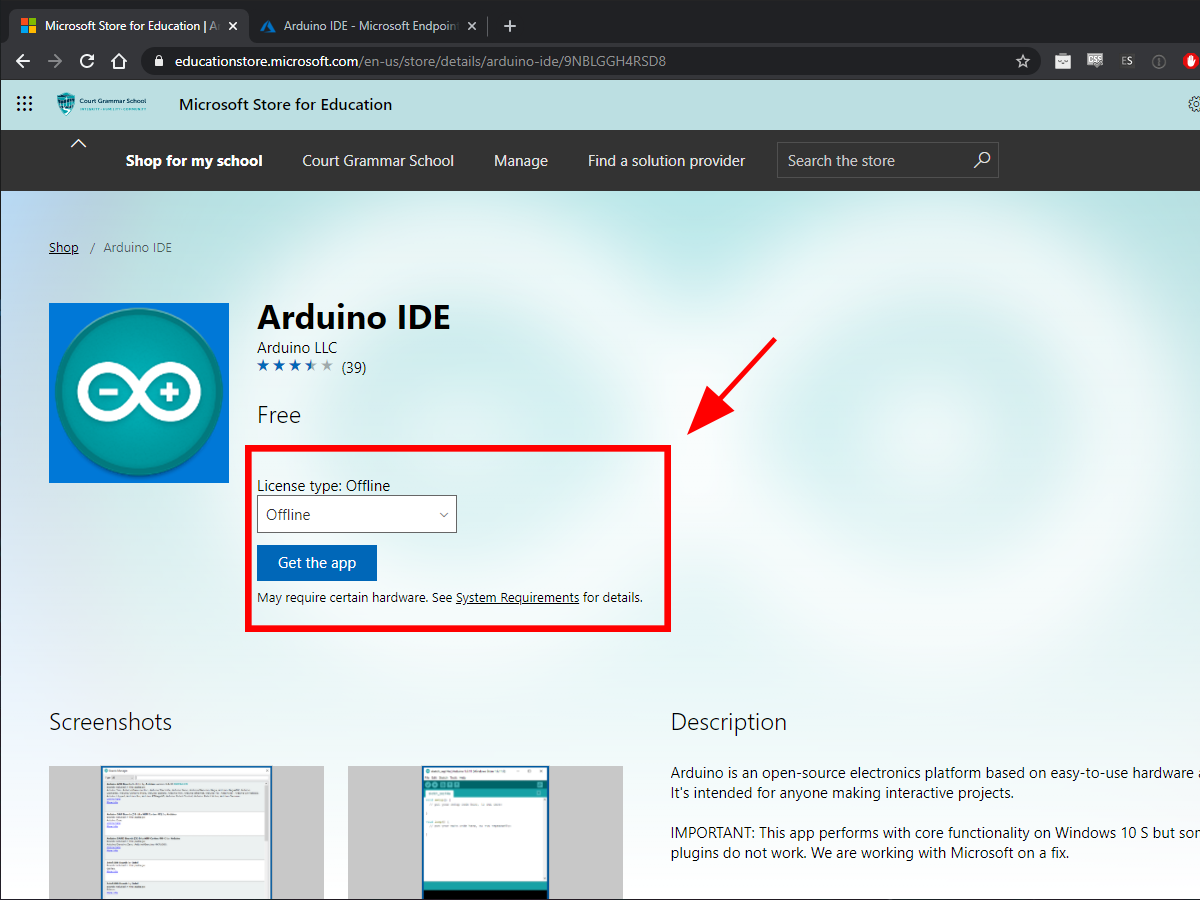
5. Select Manage from the top menu again, now select Manage apps. 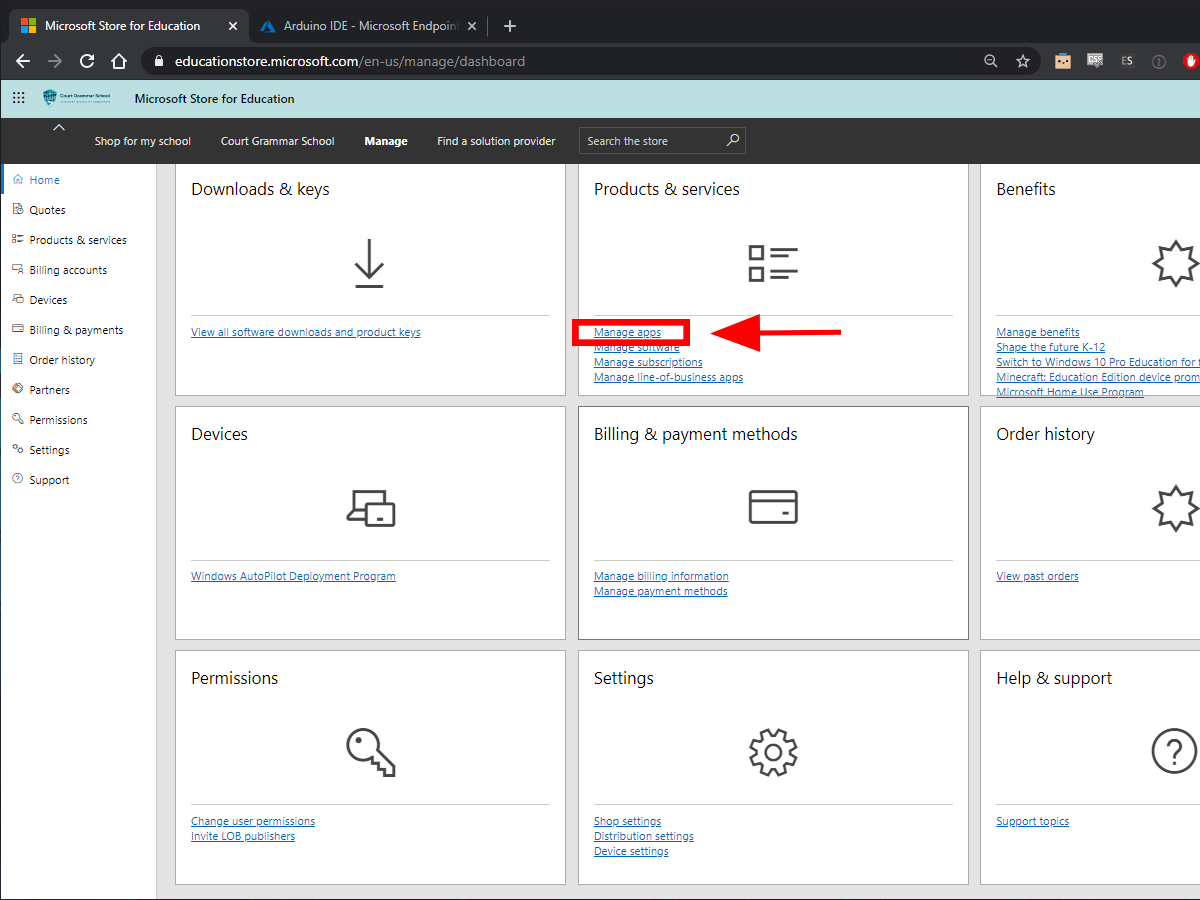
6. You will now be able to see the Offline version of the app along with the other apps you have already procured. Select the app. 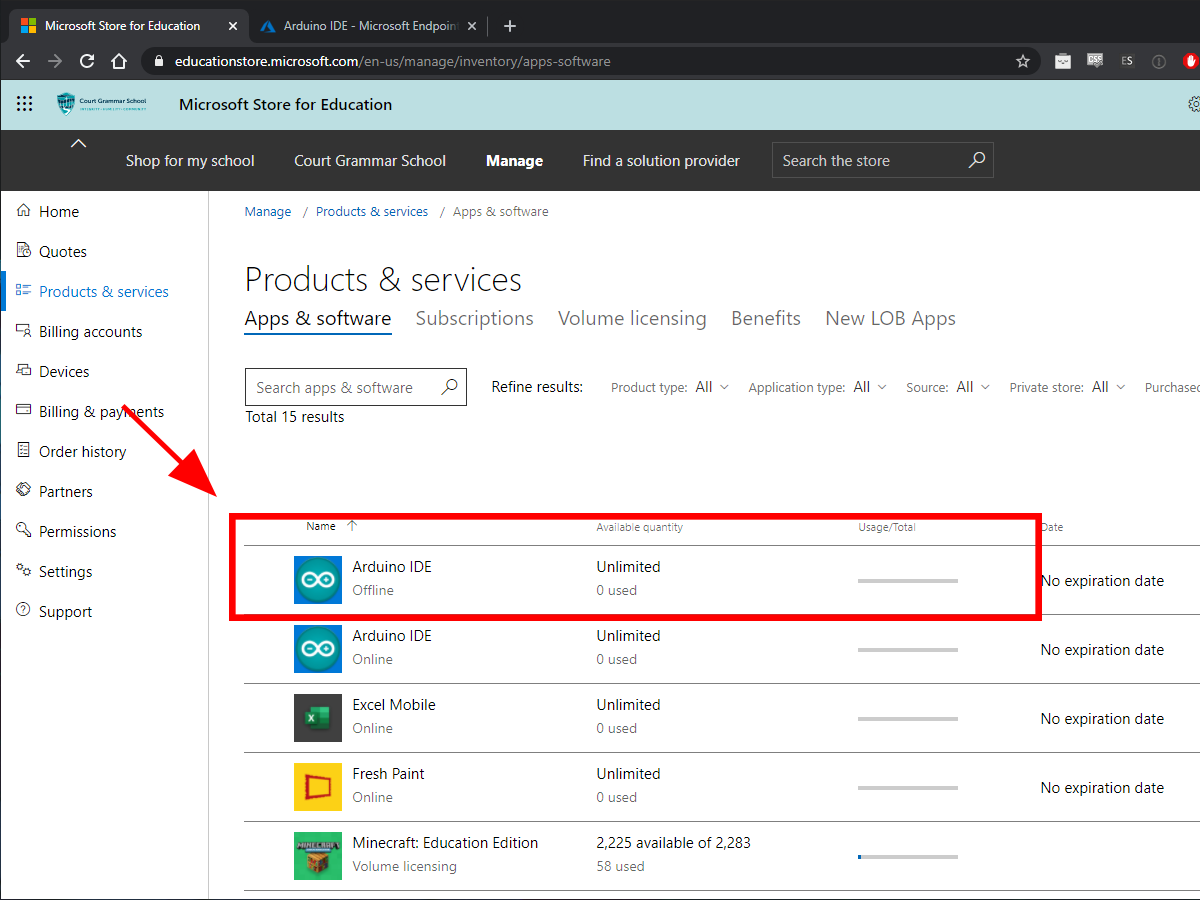
7. Scroll down the page and download the package for offline use. Don’t select the first Download button, that is just for the app metadata. This will download the .appx file.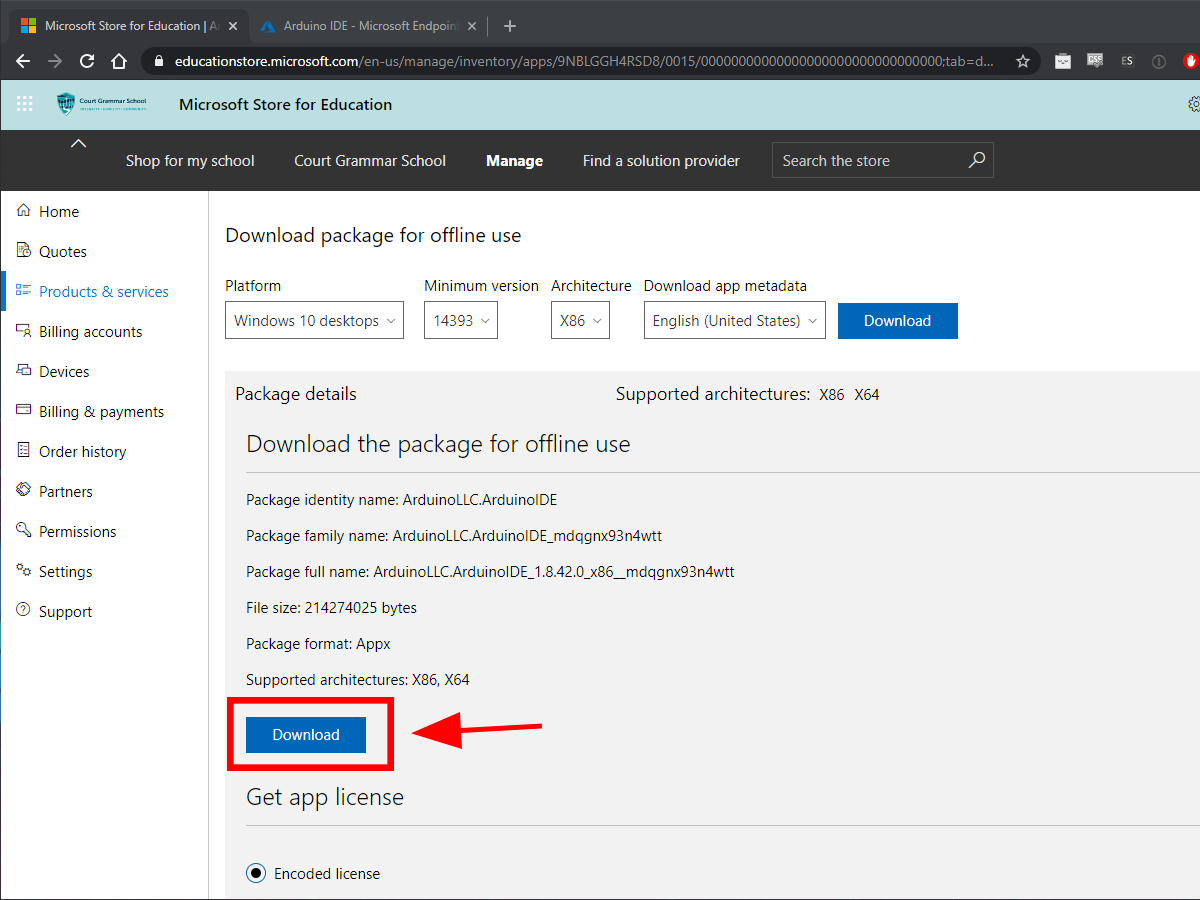
8. From Endpoint Manager, deploy a new app selecting Line-of-business app. 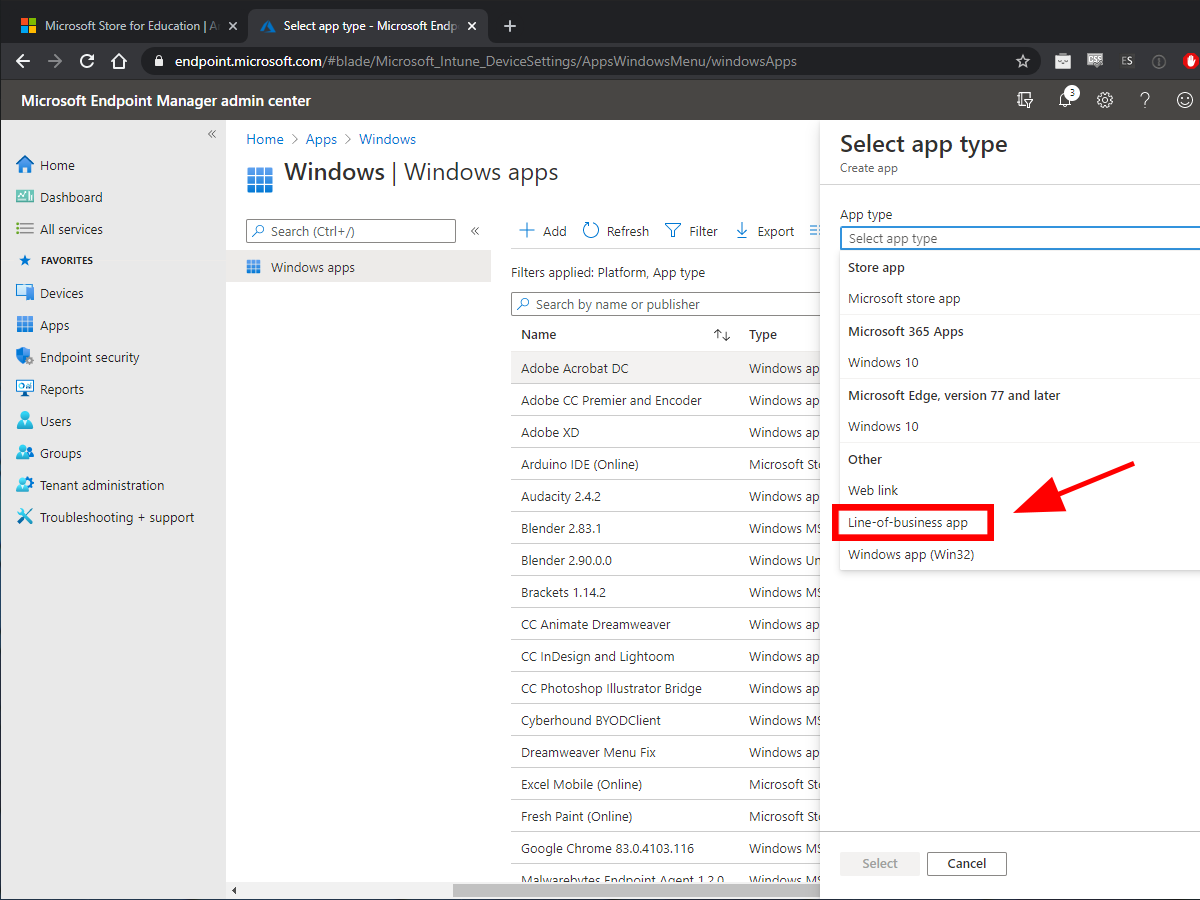
9. Now, once you set the Assignments for the app you will be able to select Device Context.